Question 87 of 100
(demo test)
Product Demo for COA Exam Questions
-
You notice that the light on an old school projector is becoming dim. You open the cover and look at the bulb and find that one side is dirty. What should you do?
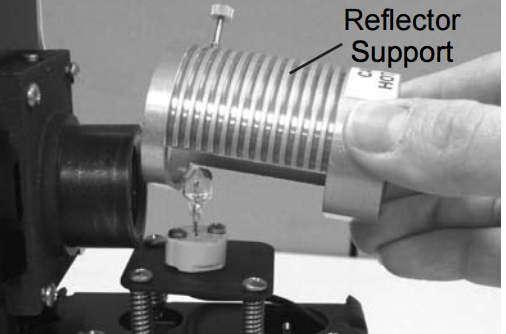
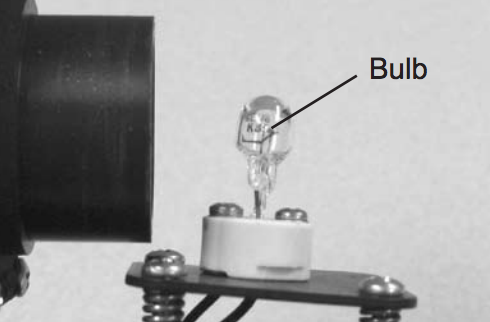
The right move is to turn the bulb 180 degrees. Light leaves the bulb through the glass and travels forward to the lens system. A dirty patch on one side of the glass blocks that light, so the chart looks dim. Rotating the bulb halfway around puts the clean side of the glass in the light path. The chart brightens at once. You take nothing apart and you throw nothing away.
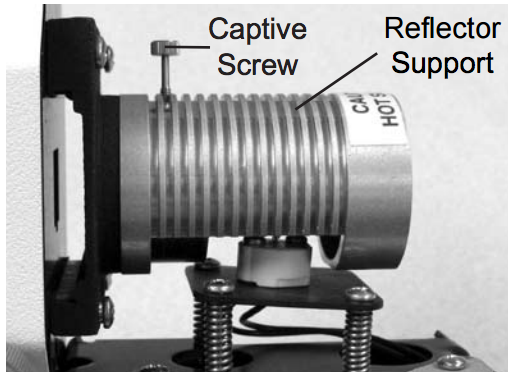
A manual projector has three main parts. There is a housing for the bulb, a tube with a lens system for focusing, and a slot for the glass slides. A reflector sits behind the bulb and aims its light forward. That reflector is assembled and aimed at the factory, so you must never take it apart. When the light is weak, the textbook asks a simple question first: is the bulb burned out or darkened? A darkened bulb is a warning sign, not just a dirty part. The book also notes that the projected chart often dims in one half of the screen shortly before a bulb fails. So rotating the bulb is a short-term fix. Order a new bulb and replace it soon so that acuity testing stays accurate.
Two safety habits go with this job. Unplug the instrument before any service, even a bulb change. Let the housing cool first, because a bulb that just burned out can be very hot. Handle every bulb with lens tissue, because oil from your fingers can etch the glass once it heats up. Keeping the chart projector bright and safe is part of the COA equipment maintenance and repair content area.
Incorrect Answers
- A. The lamp reflectors are assembled and positioned at the factory. You should never take them apart. The reflector behind the bulb can be wiped clean while it stays in place.
- C. Oil from your fingers etches the bulb once it heats up. That shortens bulb life and dims the light even more. Use lens tissue instead.
- D. Never run the projector with the lamp compartment open. The lamp runs hot and under pressure. It must be shielded so it cannot be hit or shatter.
Testing Pearls
- Check the simple things first: the plug, the connections, a burned-out or darkened bulb, and the fuse.
- A projected chart that dims in one half of the screen often means the bulb is close to failing.
- Handle instrument bulbs only with lens tissue, never with bare fingers.
- Disconnect the power source before any service, even changing a bulb or a fuse.
- Clean projector slides with dry photographic lens tissue only, never with water.
References
- American Academy of Ophthalmology. Ophthalmic Medical Assisting: An Independent Study Course. Chapter 22, Care of Ophthalmic Lenses and Instruments.